Add Flair To Your Forms With Achievements
Achievements are everywhere you look. You can get them for checking into your favorite restaurant through Foursquare, you can get them for writing code within Visual Studio, and you can definitely get them on any game that you play on your phone. So why not add them to your Dynamics AX forms so that you can add a little pizazz to day.
In the immortal words of Stan… I need to talk about your flair.
How To Do It…
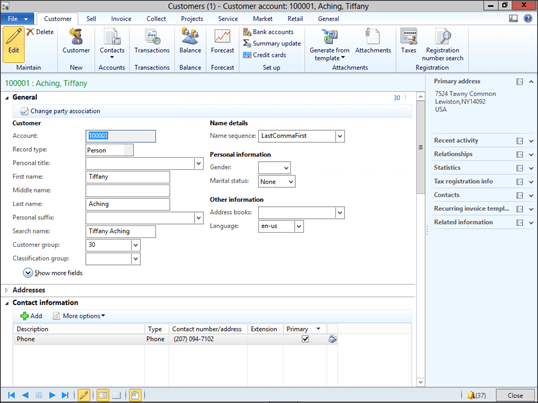
Start off by finding the form that you want to add your achievements to.
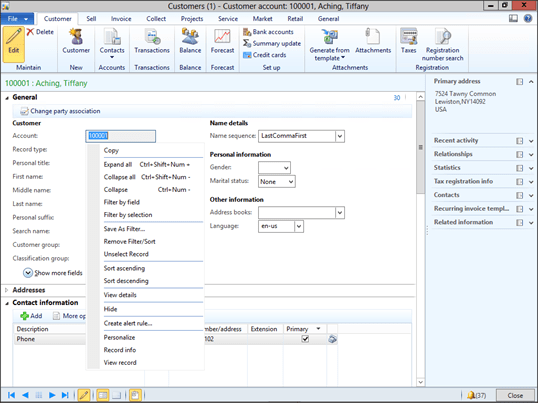
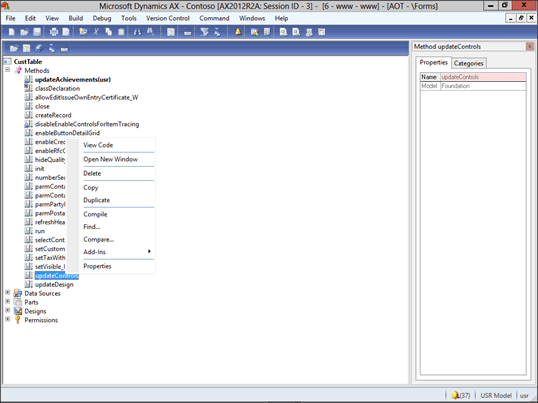
Then right-mouse-click on the form, and select the Personalize option from the pop-up menu.
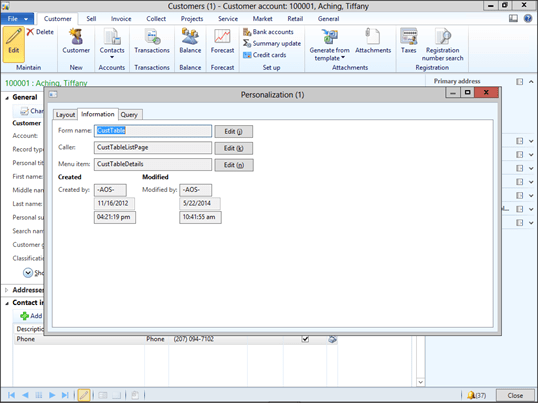
When the Personalization form is displayed, switch to the Information tab, and click on the Edit button to the right of the Form Name field.
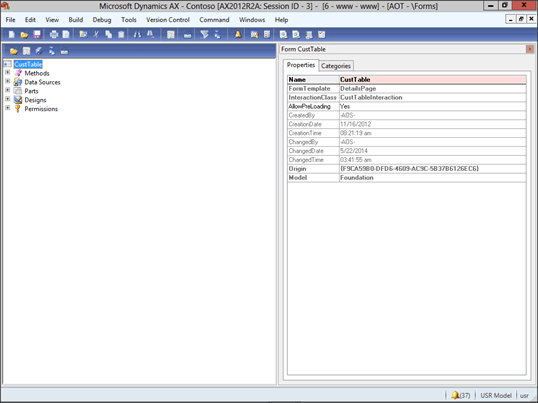
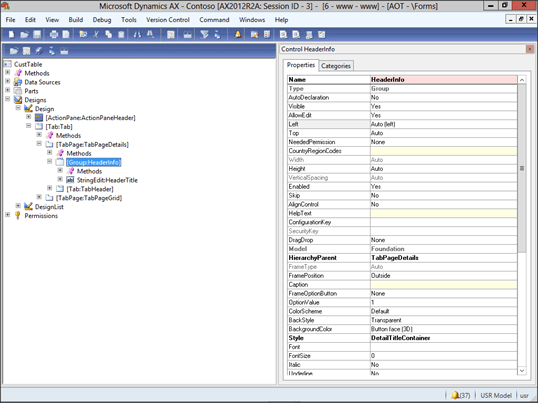
This will open up AOT and with just the form that we selected showing in the explorer.
Expand out the Design section to the spot that you want to add your flair. In this case we will add it below the title on the form details.
Then right-mouse-click on the group form and select the New Control option from the pop-up-menu, and then choose the Button control.

This will add a new Button control to the group.

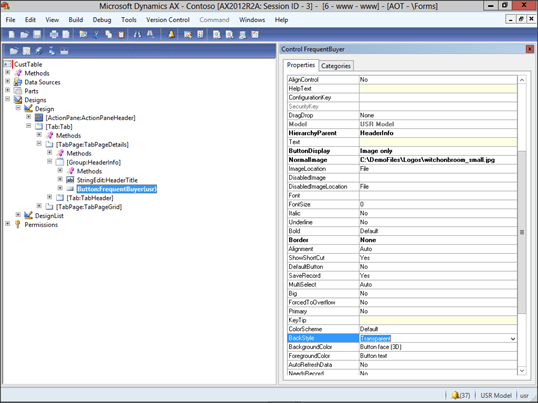
Within the Properties panel, update the Name.

Set the Button Display property to Image Only.

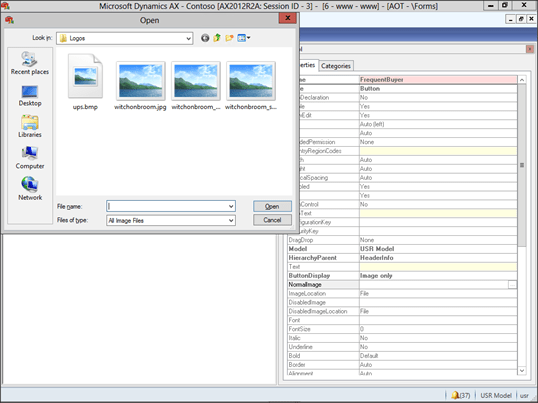
Then click on the … to the right of the Image URL property so that you can browse and select an image to show for the button.
Set the Border to None so that the button shows up as a flat image… which looks nicer.

And finally, set the Back Style to Transparent so that it doesn’t look like a button J
Now we need to create a method that we will use to tell Dynamics AX if we want to show the achievement button or not. To do this right-mouse-click on the Methods folder within the AOT and select the New Method menu item.

This will open up a new X++ editor window.

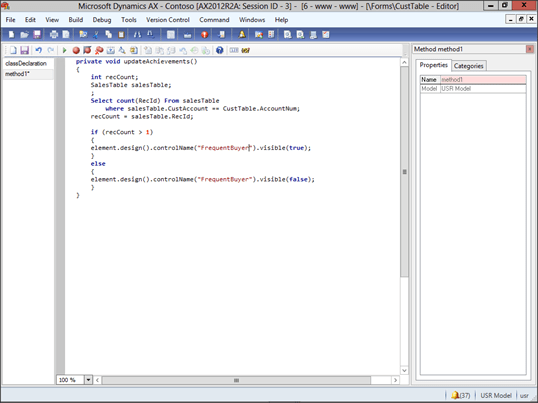
Replace the code within the method with the following code.
private void updateAchievements()
{
int recCount;
SalesTable salesTable;
;
Select count(RecId) From salesTable
where salesTable.CustAccount == CustTable.AccountNum;
recCount = salesTable.RecId;
if (recCount > 1)
{
element.design().controlName(“FrequentBuyer”).visible(true);
}
else
{
element.design().controlName(“FrequentBuyer “).visible(false);
}
}
Once you have updated the code, you can close the editor.
Now we have all of the framework for our achievement. We just need to update the form to tell it to refresh for each record. To do this, expand out the Methods folder and double click on the UpdateControls method.
This will open up the X++ editor with the code that is ran every time the record is refreshed or changed.
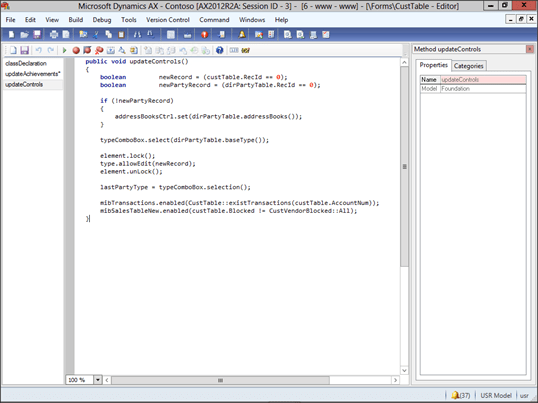
Add the following code to the bottom of the method:
This.updateAchievements();
Once you have done that, save the updates and then close out of AOT.

How It Works…
Now when we open up the form, if the condition is met (in our case more than one order being placed for the customer) then everything looks normal.
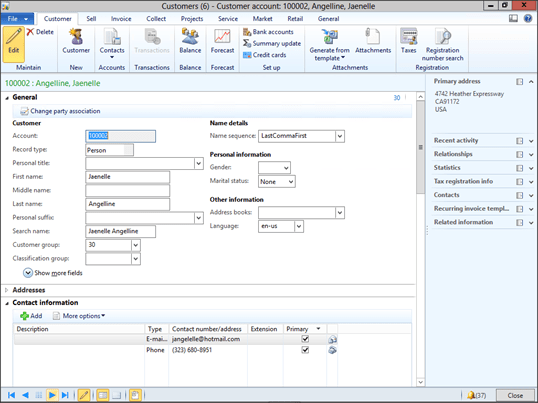
But if they have met the criteria then it shows up.
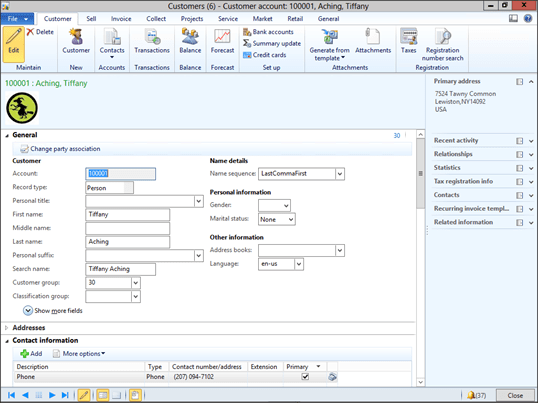
How cool is that.

Reblogged this on A Tinkerers Notebook.
WANT!!! Thanks for the great details. I have a user who will eat this up GOAL ACHIEVED! NEXT LEVEL UNLOCKED!
If I was a good programmer I would create an Achievements module for AX, but unfortunately I’m just a hack 😦
You are a gem, Murray not a heck.
You are a GEM not heck 🙂
I try 🙂
If you can add an image there, could you do the same in a FastTab title heading (i.e. to show an image when the FastTab is collapsed?
Unfortunately it doesn’t look like you can add the images to the fast tab. That would be cool though 🙂
That is too bad. Our objective was to show in the collapsed FastTab if there was any “new” data contained within it (without requiring the user to expand it). We’ll have to find some other means to accomplish this.